Thursday, March 21, 2013

Baked Italian Chicken with Asparagus and Quinoa

As I cooked tonight's meal I wondered what in the world I was going to call this dish.  I made it up on the fly so I figured Italian sounded good, I mean after all those are some of the herbs I used.  Of course I could have gone the other way toward Mediterranean based on the marinated artichoke hearts.  So really it is entirely up to you what you would like to call this dish.  Either way I hope that you will enjoy this recipe.

Baked Italian Chicken
2 chicken breasts
1 can, unsalted diced tomatoes
1 small jar of marinated artichoke hearts, drained only slightly
Small amount of garlic powder
Italian seasoning (I used a brushetta mix that I have that has dried tomato, basil, bell pepper and pepper)
Preheat oven to 350 degrees Fahrenheit.  Rub a little olive oil into the bottom of a glass baking dish (just so that the chicken won't stick).  Add chicken.  Add entire can of tomatoes over top of the chicken, add artichoke hearts.  Sprinkle with garlic powder and Italian seasoning.  Place dish into oven and cook for about 45 minutes.  These chicken breasts were rather thick.  Cook until internal temperature reaches 165 degrees Fahrenheit. 

This dish was served with asparagus and leftover Quinoa from last night's dinner. 

To cook the asparagus.  Place a pot of water on the stove and bring to a boil.  Once it begins to boil add asparagus (that has been washed and snapped - don't forget to save the snapped end (place in freezer) to make vegetable broth with later) and cook for 5 minutes.


Wednesday, March 20, 2013

Alaskan Halibut with Sauteed Red Kale and Quinoa

Sorry that I have been away for a while but I am back now and cooking in my kitchen!  It is good to be back!  Who knows what I will decide to cook up but check back often to find out!

Baked Alaskan Halibut
2 Halibut filets (these came from SeaBear)
Extra virgin olive oil
Salt (I used a sea salt that had been infused with Rosemary)
Fresh ground pepper
Preheat oven to 275 degrees Fahrenheit.  Place halibut onto a cookie sheet, drizzle with olive oil and sprinkle with salt and pepper.  Cook for 20 minutes.

Sauteed Kale
Kale, de-stemmed, rinsed and chopped slightly
Coconut oil
Salt and Pepper
Place a small amount of coconut oil into a large skillet.  Heat over medium high heat.  Add kale, toss to cook.  You only want to cook it until it just begins to wilt, don't over cook it.  Serve.

I also made quinoa which I cooked based on the directions on the package.


Friday, March 15, 2013

Corned Beef Part 2

Here is the second part of the Corned Beef.  Like I said in my previous post, I have never made a corned beef from scratch before.  Here is the link to my previous post for Corned Beef Part 1.

This isn't as traditional dinner as I had wanted due to a death in the family.  I actually had to bring the brisket with me out of town and cook it.  However, I am pleasantly surprised as to the taste of the brisket (corned beef).

Corned Beef with Cabbage 
2 pound beef brisket (that has been in the brine)
2 carrots, cut into chunks
1 onion, cut into a wedge
1 teaspoon dry mustard
Sprig of thyme and a small bunch of parsley tied together
1 cabbage, chopped
Salt and pepper
Put the brisket into a saucepan, with carrots, onions, mustard and herbs.  Cover with cold water, and bring gently to a boil.  Simmer covered for about 3 hours.

Cabbage
Since the pan I was using didn't have enough room for the cabbage I put the cabbage into a separate pan.
Place cabbage into a pan.  Add a little bit of the onion and the carrot to the pan.  Add cold water to cover the cabbage and bring to a boil.  Bring to a simmer and let simmer for about the same amount of time as the brisket.

I didn't serve mashed potatoes like I wanted to do (too much going on), however next year I am going to do this again and serve mashed potatoes, Irish Soda bread and maybe a good Irish beer.


Thursday, March 7, 2013

Baked Salmon over Spaghetti Sqaush

I bought a spaghetti squash a while ago at the grocery store and there is sat on the counter staring at me everyday.  Finally I decided to cook it so that it would stop looking at me everyday, asking why haven't you cooked me?  Okay,so the vegetable really didn't talk to me but we all have had this happen to us.  We go to the grocery store purchase many items and then all of a sudden you find something that you must have, you buy it and never do anything with it.  It goes bad and you have to throw it away.  We have all had this happen a time or two.  I was not going to let this happen with the squash.

This recipe is super simple, you just need to have time to bake the squash.

Baked Salmon over Spaghetti Squash
1 spaghetti squash
2 pieces of salmon (this came from Sea Bear)
a couple of tomatoes, seeded and diced
a small amount (maybe 8) green olives - mine came from the grocery store they were big green olives in a Italian spice
Feta cheese  (this cheese came from a local farm Spring Mill Farm, they have the best goat cheese!)
Olive oil
Salt and pepper
Preheat oven to 350 degrees Fahrenheit.  Cut squash in half and dig out seeds.  Place squash onto a cookie sheet and place in preheated oven.  Bake for 45 minutes or until fork tender.
Place salmon onto a cookie sheet, drizzle with olive oil.  Sprinkle with salt and pepper.  Place into the oven about 15 minutes prior to the squash getting done.
Remove squash from oven when done.  With a hot pad in your hand, hold the squash and with your other hand use a fork to scrape out the insides of the squash (it will look like spaghetti).  Place squash into a bowl, add tomatoes, olives and a little bit of olive oil (just a little).  Place squash onto plate and place cooked salmon over top.  Sprinkle with feta cheese and serve.


Monday, March 4, 2013

Corned Beef Part 1

I have a confession....I have never before made corned beef from scratch.  I usually buy it at the grocery store pre-made and all you have to do is cook it.  I haven't bought it in several years because I never know where the meat comes from or what exactly those spices were.  I bought this cookbook called "Real Food Fermentation - Preserving Whole Fresh Food with Live Cultures in your Home Kitchen" by Alex Lewin.  In this book it has a recipe for homemade corned beef.  I thought I would give it a try, after all Saint Patrick's Day is right around the corner.

Corned Beef
1 beef brisket flat, approximately 2 pounds
3 tablespoons sea salt
2 tablespoons sugar, or caloric sweetener of your choice (rapadura, muscovado, molasses, and brown sugar are good choice)  - I used brown sugar
3 tablespoons pickling spices - I used a pre-made mix that I picked up at the local co-op (look below for what it contained)
1/2 cup whey (see below for recipe)
1 cup non chlorinated water

1. Pierce the brisket many times, quite deeply, with a metal skewer or other long, sharp object.

2. Mix the dry seasonings in a bowl and then rub them into the brisket.  Place the brisket in a bowl or jar.

3. Mix the whey with the water, then pour mixture over the brisket, making sure that it is completely submerged.  If you need more liquid, make more brine using 1 cup water, 1/2 cup whey, and 3 tablespoons salt.  (I had to make more brine at least 3 times to properly submerge the brisket)  (I used a bowl upside down to keep my brisket from floating and staying submerged).

4.  Cover the bowl with a cover of some sort or close the jar.  (If you use plastic wrap, make sure that the plastic is not touching the meat or the liquid).  Allow the meat to sit for a day at room temperature, turning every several hours and making sure that the meat remains submerged.  Then refrigerate for at least a day and up to 2 weeks.

**Pickling Spice contains - (all organic) - yellow mustard seeds, cinnamon chips, whole allspice, dill seed, celery seed, bay leaf, mild chilies, cloves, caraway and ginger root.

Brisket in dish with brine

with the bowl on top to keep the brisket submerged


Whey
1 quart plain yogurt (I used a very high end plain organic yogurt)

Equipment needed: Fine cheesecloth (if possible find cheesecloth that is not bleached with chlorine), large fine-mesh strainer, mixing bowl or pitcher to suspend the strainer over, wood spoon (optional).

1. Moisten the cheesecloth with chlorine free tap water, and lay it on the inside of the strainer.  (by moistening the cheesecloth ahead of time, you minimize the amount of whey that the cheesecloth absorbs.

2. Put the strainer over the bowl or pitcher (I actually used a glass jar, like you would use for sun tea).

3. Scoop, spoon or pour the yogurt into the strainer, and let it drain.

4.  When the yogurt has drained a bit, you may, if you wish, try to tie the ends of the cheesecloth around the handle of a spoon in such a way that it can continue to drain into the bowl or pitcher.  If you don't do this, then cover the strainer with a plate or something similar to keep foreign objects out of the yogurt. (I did this because the weight of the yogurt in the cheesecloth will hang off of the spoon will help it to drain).  (I let my yogurt hang overnight on the counter).

5.  When the yogurt has thickened, put it in a sealed container and refrigerate it; it will continue to thicken as it cools in the refrigerator.  Put the whey in the refrigerator, too.  Consume them both within a couple of weeks, although they may last longer.  When they have started to go bad, you will know because they will get slimy or moldy.

Whey. what you get when the yogurt is strained.

This is what you get once the whey has been strained out.  This is what you call Cream Cheese.
Use this on bagels or anything else you might use cream cheese for. 

I apologize for not having a picture of the yogurt straining in the jug or hanging on the wooden spoon.  I thought for sure that I had taken a picture.  If you have any questions about this, please feel free to leave your comments below and I will answer them.

Make sure that you check back and  look for Corned Beef Part 2 sometime around Saint Patrick's Day when I cook the beef and have a "what I call" a traditional Saint Patrick's Day dinner.


Homemade Vegetable Broth

Remember back last summer when I mentioned in my posts about saving some vegetables to freeze?  They were of vegetables that you didn't use all of, like the top part of the leeks, or the harder part of the asparagus.  Well I took all those vegetables from the summer, froze them, and I used them to make broth.  It is super simple to do, especially when you use a crock pot.

Homemade Vegetable Broth
Leek pieces, leftover from summer and frozen
Asparagus pieces, leftover from summer and frozen
2 large Carrots, cut into large chunks
Spinach (I used a frozen bag of spinach)
2 bay leaves
black pepper
Place all vegetables into the crock pot.  No need to thaw them out, they will thaw out in the crock pot.  Add enough water to cover the vegetables (I filled it with water to about the top).  Place crock pot on high for about 8 hours, turn to low and let cook overnight.  This helps to give the broth a great flavor.  Strain the broth through sieve or small strainer (make sure that you press on the vegetables to get all the juice out).  Place broth into mason jars, label and freeze.  You now have fresh broth ready to use anytime you want to make something.


Friday, March 1, 2013

Coffee Cake

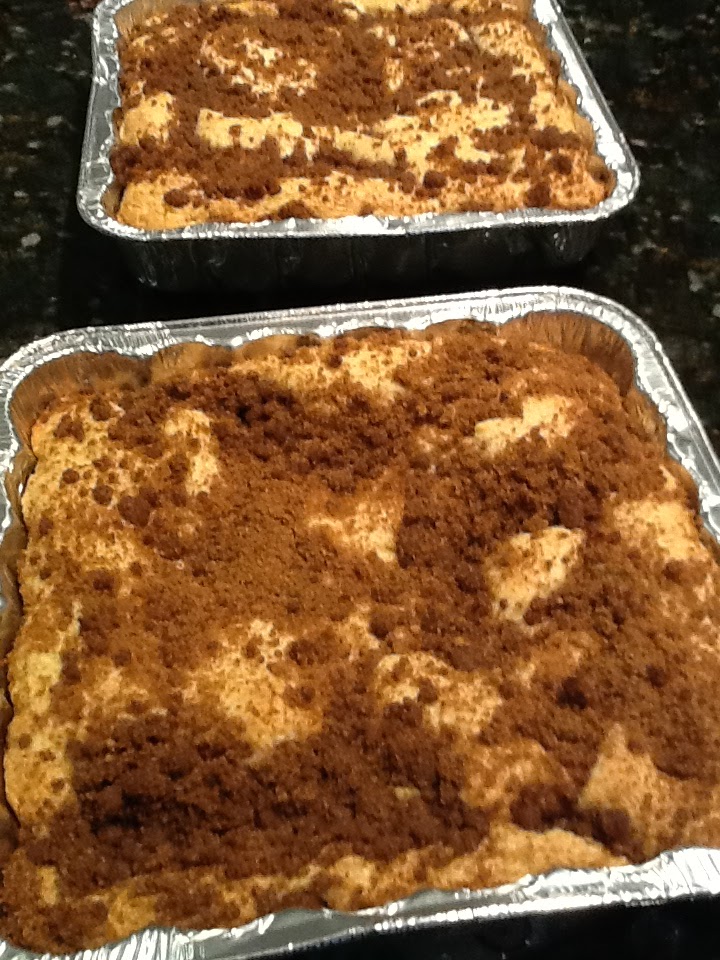
I wanted to make some coffee cake to take to work with me today for everyone to enjoy.  I put the majority of the ingredients together the night before so that when I got up I could easily add the remaining ingredients, bake and take to work while it was still hot.  I made two of them, one for work and one for home.

Coffee Cake
1/4 cup vegetable oil
1 egg, beaten
1/2 cup milk
1-1/2 cups flour
3/4 cup sugar
2 teaspoons baking powder
1/2 teaspoon salt
Combine oil, egg and milk in a mixing bowl.  Add dry ingredients to milk mixture and mix well.  Pour into greased 9x9x2 pans.  (I actually used foil pans that were 8x8).  Sprinkle with topping (ingredients below).  Bake at 375 degrees Fahrenheit for about 25 minutes.

Topping
1/4 cup brown sugar
1 tablespoon flour
1 teaspoon cinnamon
1 tablespoon butter, melted
Combine all ingredients in a small bowl until crumbly.  Sprinkle over cake.